by Dave DeWitt
|
Part 4: Meaty Matters: The Carne in Chili
|
Recipes: Old Buffalo Breath National Chemistry Day Chili |
After chiles, meat is the most important part of chili–and probably the most analyzed ingredient of the bowl o’ red.. Fortunately, we have historians, cook-off champions, and even a chemist or two to guide us.
The Chosen Meat
“Some Texans at a chili cook-off will make chili from any type of meat that isn’t obvious poison,” observed Texas food experts Phil Brittin and Joseph Daniel. “Riding high atop the whims of culinary inspiration, they will cook with wild boar, bear, rattlesnake, raccoon, armadillo, and nutria.” Other animal meats that appear in chili are porcupine, javelina, jackrabbit, shrimp, and squirrel. Hunters believe that venison makes the best chili–or elk, or even moose–and restaurant chefs love pork or veal. It strikes us as odd that chicken chili is rarely mentioned.
Granted, there’s no law prohibiting the use of such meat-bearing critters, but most competition cooks stick with beef. “The generally accepted carne is beef, mature beef,” wrote Joe Cooper in With or Without Beans in 1952. After all, considering the possible origin of chili along cattle drives, it would be downright disloyal to put lamb or goat meat in chili. Given that the ideal meat in chili defaults to beef, the debate really begins to heat up.
|
|
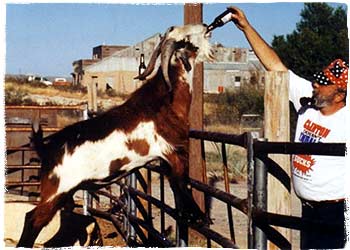
Fattening Up the Goat for Chili — Not!
|
Your Cut, Señor
There is a chili axiom that holds: Only Use The Poorest Cuts of Beef For Chili. One of the first chiliheads to formulate that axiom was Joe Cooper, who wrote, “It is not ever desirable, much less necessary, to buy expensive cuts of prime or choice beef for a pot of chili.” The reasoning was, that because of its long cooking time, chili needed cuts that have worked the hardest on the steer and are therefore the toughest and least fatty: the neck, rump, and legs. Beef stew meat is composed of such cuts.
Cooper proclaimed that “the best carne is bull neck–normally the least desirable meat in the carcass of an animal which best should be three to five or six years old.” Since such a cut was hard to find, he relented and suggested any chuck shoulder cut.
Bill Bridges reported in The Great American Chili Book that Merle Ellis, the syndicated butcher, recommended the center section of the beef shank. “With long, slow simmering, like a pot of chili gets,” Ellis wrote in his column on chili, “the connective tissue in beef shank virtually dissolves and makes a rich, beefy pot liquor that is the very essence of a good pot of chili.”
Floyd Cogan noted that cows and steers always lie down on the same side, and that the “beefy side” of a cow or steer is side which they do not lie down on. He suggested taking note of which side the steer lies on, and then selecting the other side for chili meat–a suggestion that our city-dwelling chili cooks will find a bit difficult to utilize.
|
|
Not the Perfect Meat for Chili, But
|
Our chili chemist, Dr. John K. Crum, wrote in his paper, “A Small Dissertation Upon Chili con Carne,” that a “good quality round steak” makes the best chili. Other steaks that commonly appear in chilis are chuck, flank, and even sirloin. John Thorne suggested brisket, which is certain to bring protests from the barbecue crowd. Andy Housholder, author of How to Make Championship Chili and Win! insists that London broil is the cut of choice. Whichever cut you select, Floyd Cogan suggests one with a little more fat than usually appears in round steak. Joe Cooper disagreed, suggested lean meat, and wrote that the “fat will be added under its own entity.” But more on fat later.
Battle of the Meats: Ground vs. Cubed
Finally, there is some minor agreement on one point in chili-making: that hamburger meat makes lousy chili. John Thorne observed: “Ordinary ground meat turns to mush when subjected to long cooking. It also reminds some cooks of spaghetti sauce, with disastrous results…one-half inch cubes are the established norm.”
Many chili cooks these days believe that only a stainless steel knife should be use to cut the cubes that size. Some purists disdain knives and prefer scissors to cut the meat because their cut supposedly retains the juiciness and flavor of the meat. Considering the fact that the meat breaks down during cooking no matter what cuts it, the fallacy of using scissors is obvious.
R. F. Carlisle analyzed that two sizes of cut meat were optimal: “Small pieces should be in the range of the size of a lima bean, large pieces in the range of the size of a purple grape.” His theory held that in this combination, “the raw meat should have a coarser characteristic than desired in the final chili.” Andy Housholder, who won 14 out of 18 chili cook-offs in eight years, wrote that cubed meats win ninety-five percent of chili competitions.
Abilene chili expert Sam Pendergrast vehemently disagrees with the cubed meat concept. “The second and perhaps penultimate disaster for Texas Chili,” he wrote, “is the “Cubed Steak with Brown Gravy Syndrome” (CSWBG), and it probably started–as many bad things do for Texas–around Houston. I think the CSWBG movement might have evolved through a scenario rather like this: probably under the mistaken truism that more expensive is automatically better in all things, somebody started buying high-grade steak and carefully hand-slicing it into tiny, uniform, fat-free cubes, then sauteeing them into a rich gravy without too much of those old Mexican spices that have given chili such a good (or bad) name over the years. Eventually the cubed steak won a chili contest–probably sooner than later if the cook happened to be a judge. Eventually, lots of cooks started making the cubed steak ‘chili,’ and as more of it was made, more of it was likely to win contests–particularly since a preliminary judge who had cubed his steak might have an advantage in recognizing his own recipe.”
Sam, of course, preferred his meat in the classic “chili grind” method, whereby butchers used three-eighths inch or half-inch holes in the blades of the meat grinder. Chili grind is often not available in supermarkets, but it can be replicated by using an electric meat grinder with a coarse blade.
The purpose of cutting or grinding the meat is to, in effect, render it into smaller morsels that become tender more easily than larger pieces. “Tenderizing can also be effected chemically by using commercial products that contain papain or other enzymes that digest protein in muscles and connective tissue,” suggested Dr. John Crum. The chili meat of any cut or grind can be tenderized by marinating it in papaya juice or commercial tenderizing powder. Meat tenderized in such a fashion will not require the lengthy cooking times. And with all due respect to championship chilis, we should point out that with quick chilis, made for lunch from commercial mixes in about an hour, hamburger meat works fine.
The Grease and the Browning
“Why is the meat not merely cut or ground and dumped into boiling water to cook?” posited Dr. Crum. He then went on to answer his own question: “The reason is that browning imparts a better flavor to the meat because of some interesting chemistry! Frying (or sauteing) with just enough fat or oil to prevent sticking at a relatively high temperature causes the meat to brown–in very simple terms, the proteins at the surface of the meat are converted to other proteins that result in a more intense flavor.” And to achieve such a high temperature, Dr. Crum recommended using avocado oil, with its extremely high smoke point of 600 degrees F. Such intense heat, according to food chemistry expert Harold McGee, triggers “browning reactions, exceedingly complex chemical changes that involve mostly proteins and carbohydrates.”
|
|
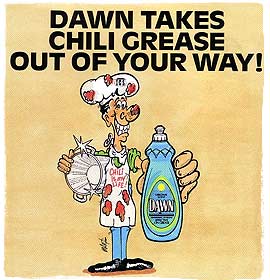
Dawn, the Grease Reliever, Was
|
Everyone knows that the crusty, browned portions of roasted and fried meats are more intensely flavored than the rest of the cut being cooked. The reason for this is that the interior of meats cannot be heated beyond the boiling point of water until all the water is removed–at which point the meat would be very tough. However, the outside of the meat can be heated extremely hot because moisture is being drawn from inside the meat. The extremely hot temperatures accelerate the browning reactions, giving the meat much more flavor. It should be noted that Dr. Crum called for browning the meat thoroughly, while many of the early chili recipes recommended browning the meat just “until gray.” It makes sense that chili meat that is more thoroughly browned will have more flavor than meat that is just gray.
There are quite a number of oils and fats used by chili cooks to brown the meat. The old timers generally used beef suet, which is the fat that surrounds the kidneys. (Tallow is the fat around the muscles.) Butchers can still provide suet, which should be fresh and then ground or chopped. It is usually rendered before the meat is browned in it, but some cooks add the meat and suet together and leave the pieces of browned suet (cracklings) in their chili. One drawback to suet is that it is saturated fat and thus highly disreputable in this day and age. However, most of the fat can be removed later. Two other old fashioned meat browning agents are bacon fat and salt pork, which purists insist impart a unique flavor to the chili.
These days, vegetable oils are commonly used to brown the meat, with corn oil being the most popular. Interesting enough, olive oil crops up often in some of the early recipes, including those from turn-of-the-century California. Safflower oil and peanut oil are also popular, as are margarine and butter. Before moving on, we should point out that some chili cooks brown the meat not by sauteing it in fat but by grilling the meat over wood or charcoal before it is ground or chopped for the pot.
In conclusion, you should memorize this part of the Great Chili Project and then begin your own experimentation with various cuts, different grinds, many fats and oils (or combinations thereof), and variations in the heat and length of the browning process. Practice is the only way to earn your Doctorate of Chili Makin’.
Recipes
This recipe, from chili scholar John Thorne, was published in a slightly different format in the Winter, 1989 issue of The Whole Chile Pepper magazine, in the Special Chili con Carne Issue that I edited. John commented: “On the Texas range, firewood meant mesquite. Not only did the trail cook use it for his open pit cooking, but the ranch cook used it to fire his wood stove. Until it was replaced with gas and electric, mesquite-flavored grilling dominated rural Texas cooking with its distinctive sweet savor. The meat for this chili is seared over charcoal where mesquite chips have been set to flame (the taste of mesquite charcoal is indistinguishable from that of any other hardwood), which gives the resulting chili a haunting hint of smoke–and without tasting a bit like barbecue, since there is no onion or tomato in it, none at all.”
For the fire:
-
Mesquite wood chips and hardwood charcoal
For the rub:
-
2 or 3 cloves of crushed garlic, salt, and chili powder
For the chili:
-
1 5-pound chuck roast
-
1/4 cup olive oil
-
8 cloves garlic, crushed
-
1 cup or more beef broth
-
Juice of 1 lime
-
2 tablespoons each mild and hot chile powder
-
2 teaspoons Mexican oregano
-
1 tablespoon cumin seeds, toasted and ground
-
Small whole dried piquin chiles
-
Masa harina
-
Salt to taste
The chuck roast should be as lean as possible and cut at least three inches thick. Two or three hours before you plan to make the chili, rub the meat all over with a mash of crushed garlic and salt, then sprinkle it with chili powder to coat it lightly. Loosely cover it with plastic and set it aside.
Fire up enough hardwood charcoal to sear the meat in an outdoor grill, preferably one with a cover. At the same time. soak a few handfuls of the mesquite chips in the water. When the coals are covered with gray ash, spread them out evenly, and scatter the soaked mesquite chips over them. Then immediately set the meat on a grill over the smoke, about an inch from the coals. Cover the grill and adjust the dampers to maintain a slow, steady heat. Let the meat sear for about 12 minutes (this process is meant to flavor, not to cook the meat) and turn over to sear the other side for the same amount of time. Remove it from the heat, saving any juices on its surface, and transfer to the refrigerator. Let it cool thoroughly, about one hour.
After the meat has cooled, trim away any surface fat or cartilage. With a sharp knife, cube the meat into the smallest pieces you have patience for, saving all juices. Heat the olive oil in a large, heavy pot over moderate heat. Stir in the garlic and saute until it turns translucent. Stir in the meat and all reserved meat juices, adding just enough beef broth to cover, or about one cup. Pour in the lime juice and sprinkle in the chile powders, oregano, and cumin, stirring and tasting as you go. Crumble in a few piquins or other fiery chiles to bring the heat up to taste. However, do not try to adjust the seasoning to perfection right now; it’s easy to ruin a chili by correcting the flavors too soon–the long cooking will smooth and sweeten it.
Lower the heat to as low as possible. If the pot is left to boil, the meat will toughen. Every half hour or so after the first hour, taste for seasoning, adjusting and thickening with the masa harina a teaspoonful at a time. The chili should be about ready to eat in three hours, although it will benefit from a night’s aging in the refrigerator.
Serve it simmering in large, heavy bowls with an ample supply of soda crackers and a side of beans, but not much else except, maybe, hot, black coffee or quart-sized glasses of iced tea or a few frosty bottles of your favorite beer. And, after a good long while, push things aside, lean back in your chair, and start arguing.
Yield: 12 servings
Heat Scale: Medium to Hot
Our chili chemist, Dr. John Crum, culminated his paper on chili con carne by proposing the following “decent” recipe. He is obviously a “with beans” chili cook; however, he does note that the chili can just be cooked with the bean liquid and the beans can be removed and used “for other purposes.”
-
1 recipe Beans for Chili! (see Recipe in Part 5), beans and cooking liquid reserved together
-
4 tablespoons avocado oil
-
6 pounds lean beef, preferably round steak, either cubed into ½-inch pieces or ground with the coarse blade of a food chopper (Dr. Crum recommends 2 pounds ground beef and 4 pounds cubed beef)
-
1½ pounds lean pork, cut into ½-inch cubes
-
6 small scallions (green onions), trimmed and cut into small cylinders
-
2 large yellow onions, chopped
-
1 red serrano chile, seeds and stem removed, chopped
-
2 green jalapeños, seeds and stems removed, chopped
-
3 ounces (1 bottle) Gebhardt Chili Powder
-
2 teaspoons powdered cumin
-
3 large cloves garlic, chopped
-
2 large tomatoes, peeled and chopped
-
2 cups strong black coffee
-
1 can beer
-
1 tablespoon brown sugar
-
½ cup masa harina
-
Water
In a heavy skillet, heat the avocado oil until very hot (over 500 degrees F.) and thoroughly brown the beef, pork, and scallions.
Add the browned meat and scallions to the beans and bean liquid and bring to a boil. Add the remaining ingredients except the masa harina and water and cook over low heat, covered, for about 2 hours. Remove the cover and cook until the chili thickens. If it still is not thick enough, add the masa harina (mixed with water to a thick paste).
Yield: 14 to 16 servings
Heat Scale: Medium


